Outdoor Side Table
How often are you looking for just the right piece of furniture and never find it. After looking at several stores for the perfect outdoor side table and not finding one under one hundred dollars. I decided to make one! I needed a rectangular table and could only find circular or square. So here we go!
Supplies
- 2- 8 foot Treated 1x2 Lumber
- 3- 8 foot Treated 2x2 Lumber
- 45-50- 2” Exterior Wood Screws
- 12-15- 1” Exterior Wood Screws
- 4- 1” L Bracket sets
- Drill/Bit (1/8)
- Miter Saw or Hand Saw
- Stain/ paint (optional)
Anytime, I create something from scratch, I always start with a drawing and measurements. This get my mind ready for the work ahead. I can adjust or change my design to fit my space, before I begin the work. From this drawing I create a cut list.
Cut List
2x2s
- 4- 27”
- 4-20”
- 7-9.5”
- 2- 23.5”
1x2s
- 2-9.5”
- 6-23.5”
A few things to keep in mind. Pre-drilling your holes will prevent the wood from splitting. With thin wood, this is easy to do. When we get to the part of attaching the legs, off center the screws so they don’t cross paths. This will be a lot more secure and avoid upset (take it from me)!
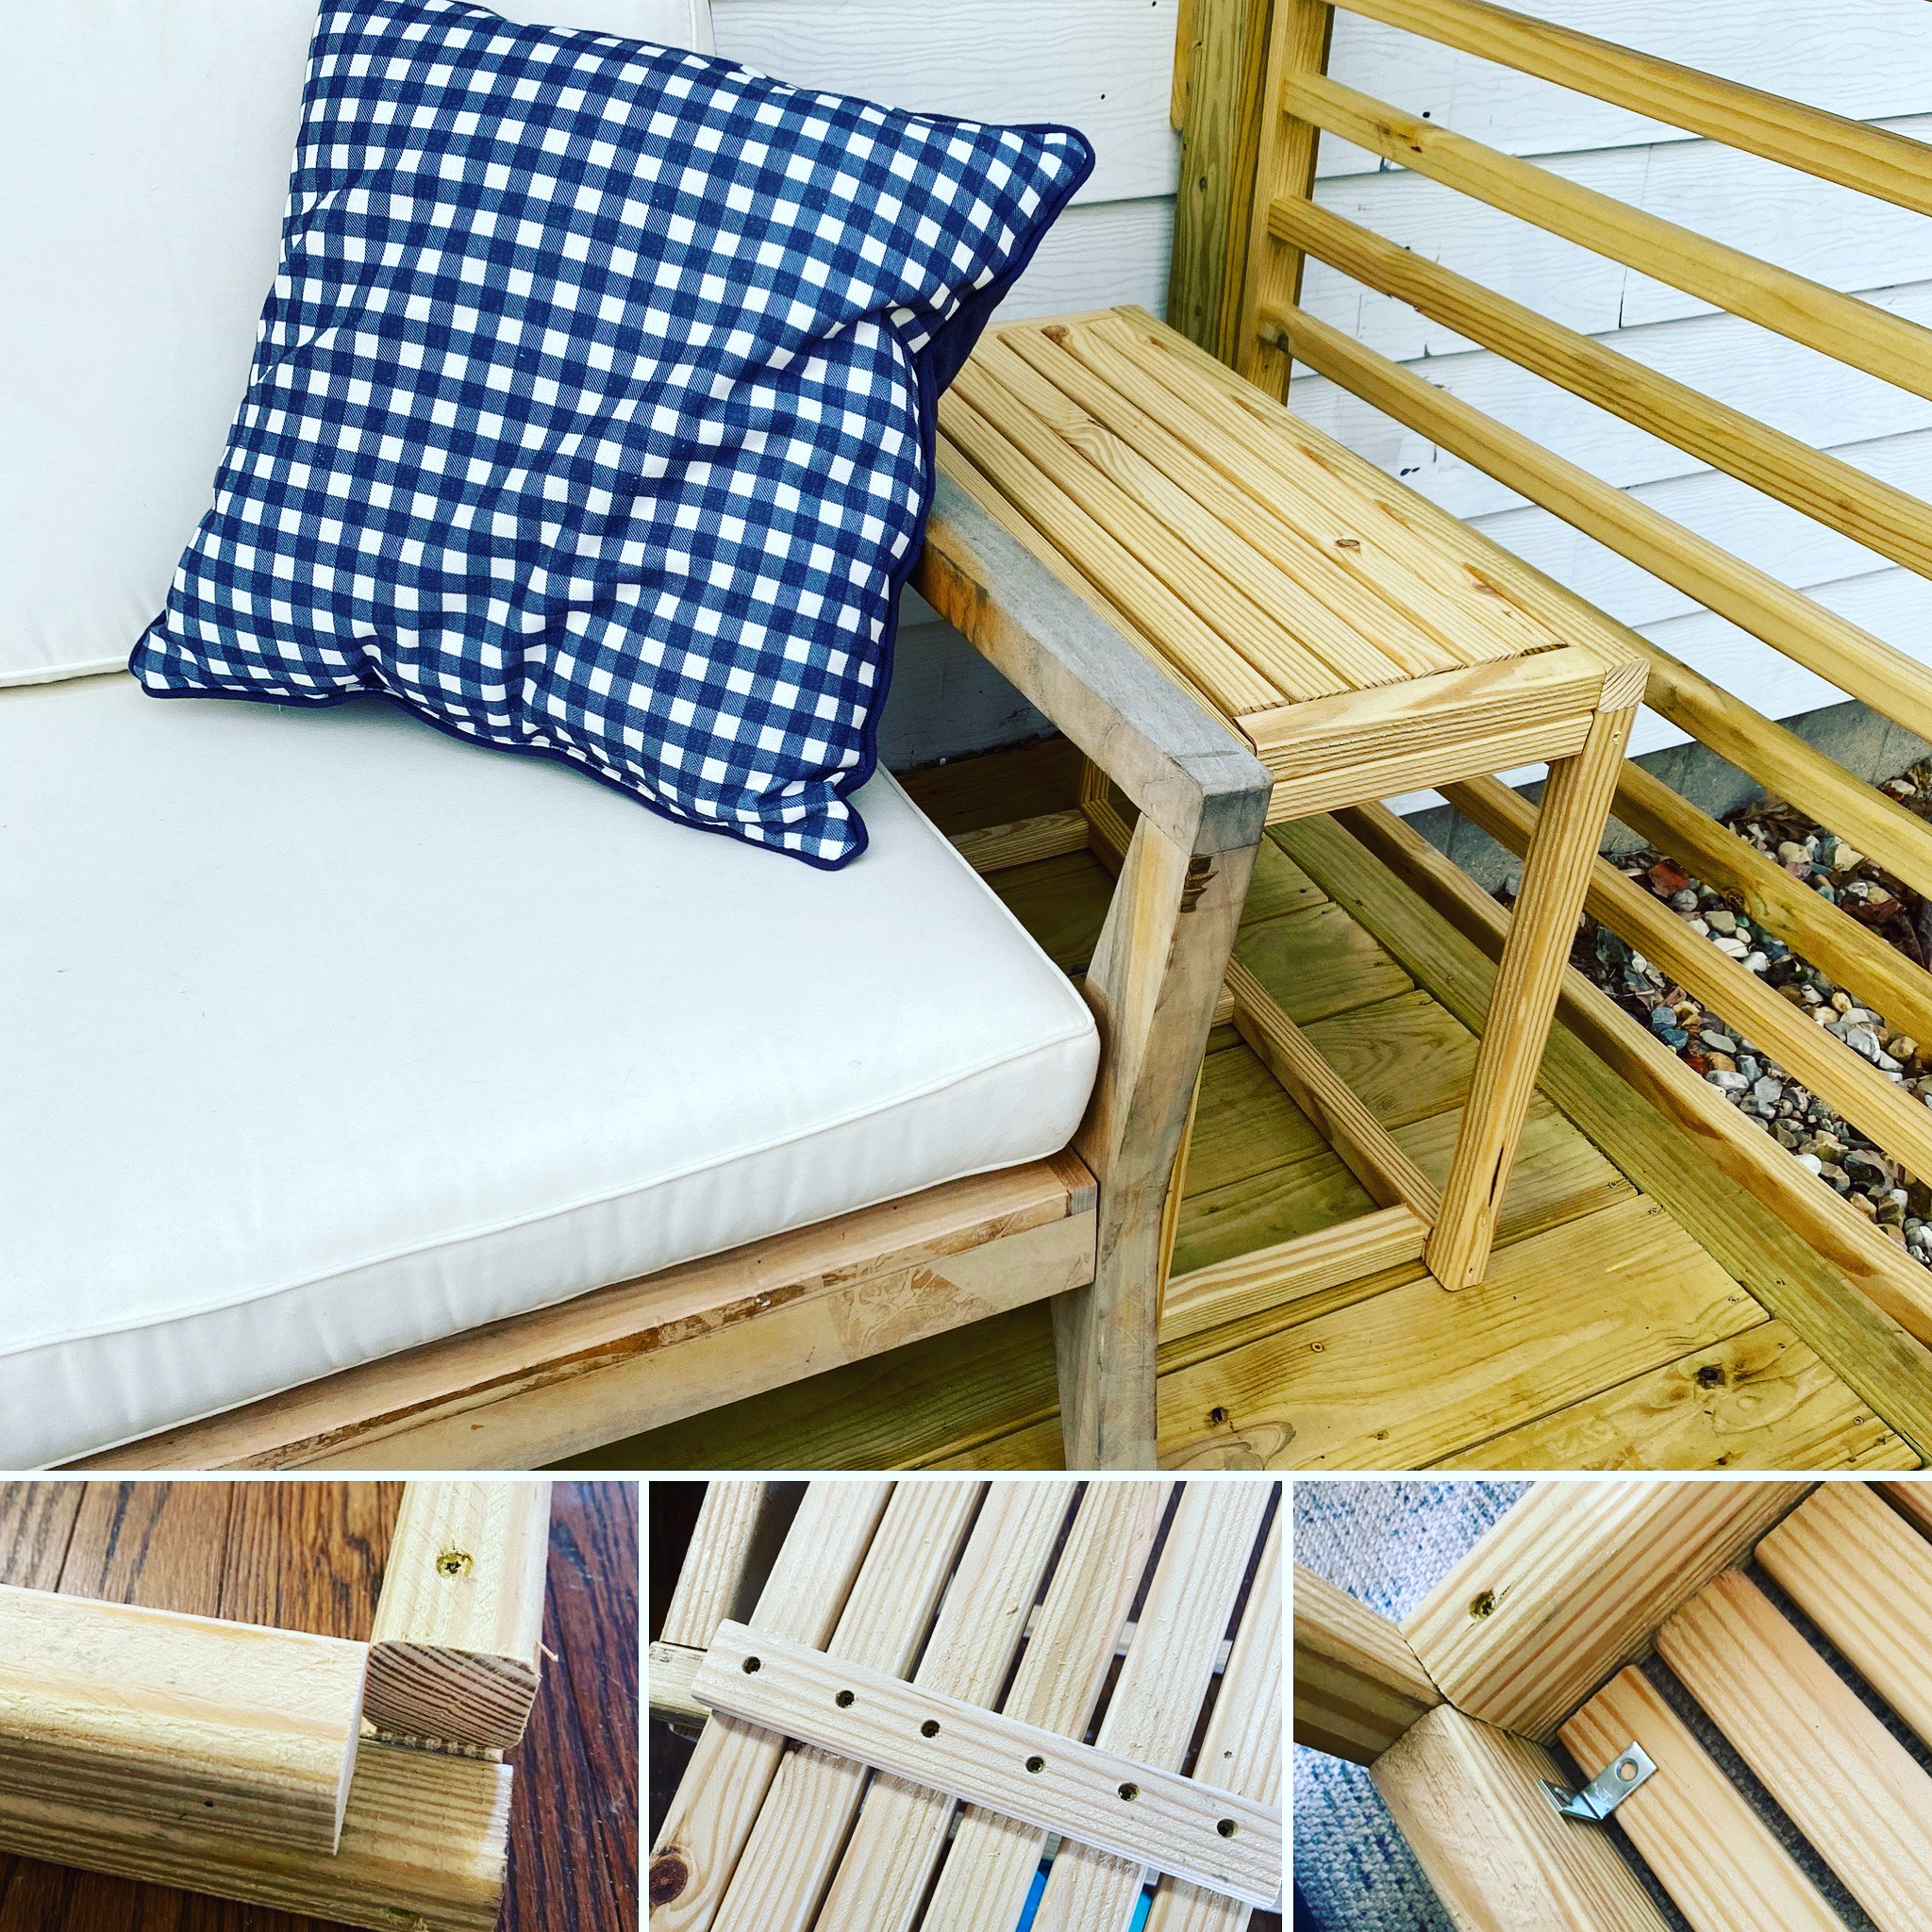
I started with the top of the table. I picked the nicer sides of the lumber and placed them all nice side down. I attached 2 of the 27” inch 2x2s, in a rectangular shape, with 2 of the 9.5” 2x2s. I placed my 9.5” pieces between the 27” pieces and drilled through the long boards with the 2” screws. I then lined up 2 of the 9.5” 2x2 boards on top of the other 9.5” boards. I attached them with two 2” screws. Be sure to place the screws about 3 inches from the ends. This will allow room for the leg screws. Repeat for the other side. Do the same with 23.5” 2x2 boards. There will be a gap of 1 3/4”, which is the exact size of the 2x2 lumber. This notch will be where you attach the legs.
To attach the legs place them in the corners of the table top. I like to pre drill my holes and start the screw before attaching. This is so you don’t have to hold, balance and drill at the same time. You will get a better connection. Remember to off set the screws by at least 1/4 of an inch. After attaching all four legs, place the other two 27” 2x2s on the legs and attach with 2” screws. I wanted more support for my table, so I added three 9.5” supports to the bottom. This was easier to put together after I flipped it on its legs. I attached one on each side and one in the middle. One support would likely be enough; but with two small children using it as a launching pad, I decided on extra supports!
For the table top I wanted to mimic the coffee table we have on the deck. It has long horizontal planks and I love the look of the clean lines. I took all six 23.5” 1x2s and lined them up and made sure they were flush at both ends. After choosing the nicer side of the lumber I faced the nice sides down and attached the two 9.5” 1x2 pieces to the back after pre drilling and evenly spacing the planks. I then flipped the table back over (top side down). I placed the planked top into the hole, nice side down, and attached each corner with an one inch “L” bracket. If you want more support, you can certainly add two more 9.5” 2x2s under the top.
You can finish this adorable little side table anyway you would like. You can paint it, stain it or leave it natural. Since we will be staining our deck in the summer, I will stain and paint this then. I plan on staining the top and painting the bottom white to match our deck. You can definitely go bold with a pop of color! This project is just a reminder that all the things don’t fit into the same size project. Don’t settle for something that works ok, when you can make it fit your needs and wants perfectly. Have fun creating!